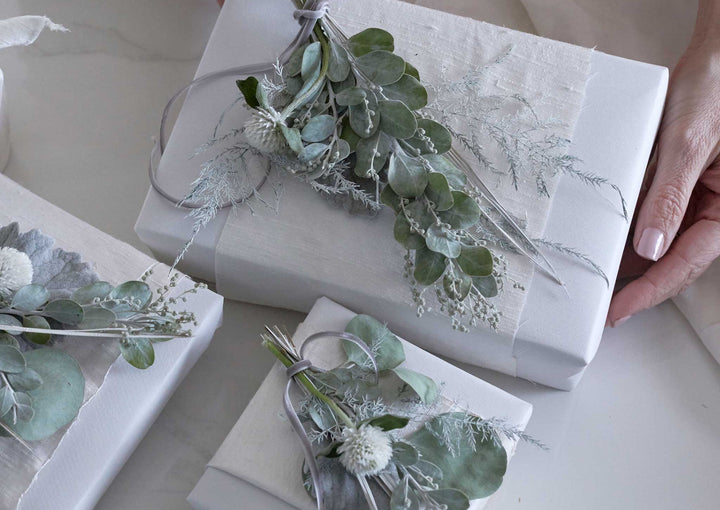
We recently partnered with one of our favorites, Athena of Eyeswoon, to create this seasonal gift wrap inspired by the look of an icy, glowing palette with the feeling of old-world luminescence. To convey the feeling of tattered opulence, a lovingly careworn mood, we drew inspiration from the lighting of a Vermeer, the touch of waking to see the sunrise over a mountain top and the feeling of gathering wildflowers along the way.
We’ve outlined the steps below in detail so you too can capture the mood and recreate the look for your own gifts this season. We hope you love this as much as we do.

Wrapping Materials:
- Silk Dupioni
- Jacquard Fabric (or any patterned, silky textured material)
- White Wrapping Paper
Topper Foliage:
- Globe Amaranth
- Dusty Miller
- Plumosa fern
- Eucalyptus (we used two types here)
- Thin wire
Additional (Optional) Materials:
- White paint
- Ribbon (we used a ⅛” velvet)

How to build a floral bundle:
- Lay out all of your foliage options so it is easy to see what you can pick from.
- For this particular look, we added some white paint to our ‘whispy’ to add some extra dimension.
- Begin building by selecting the more robust stems; a sturdy backbone for the rest of the bundle. Continue to add around the main stem, adjusting for balance to the right and left. You will want to work from larger to smaller.
- Continue to work on the bundle, adding different textures and colors. Pull and tuck for balance and visual interest.
- Once you have a bundle you like, wrap it with your wire tightly. Wrapping it tightly, close to the foliage will help it fan out. Add an additional layer of ribbon (or 2!) for a more layered look.
- You can adjust the shape a touch once everything is tied together - think about fanning the pieces just a touch!

Tips for layered wrapping with fabric:
- Start with a basic base of matte wrapping paper. A simple, solid background acts as the perfect canvas to layer upon.
- For fabric layering, you can play around with different widths in accordance to the size of your floral bundle and also, the size of your box. I love the look of an extra wide fabric band or alternatively, off center.
- You can easily adhere your fabric to the underside of the gift using a small dab from a glue gun or a string double adhesive scotch tape.
- We also have a very simple fabric wrap tutorial here!

The Final Touches:
- To add your final touch to the gift, think about how to layer your foliage bundle a touch askew. Adhere with a very small dab from a glue gun (too much will not allow them to remove the bundle) or, tie it on with a separate, longer piece of your ribbon.
- For placement, a bit of asymmetry adds just the right touch of natural happenstance.